| As of August 2020 the site you are on (wiki.newae.com) is deprecated, and content is now at rtfm.newae.com. |
Difference between revisions of "Tutorial CW305-1 Building a Project"
(→Target Firmware) |
(→Opening the Project) |
||
| Line 19: | Line 19: | ||
== Opening the Project == | == Opening the Project == | ||
| + | The first thing we'll need is [https://www.xilinx.com/support/download.html Xilinx Vivado HLx], which is their FGPA design software. The fully featured versions of this software require a $3000+ license. However, the WEBPACK version is free, with the limitation that it can only be used with 4 families of devices (including the Artix-7). | ||
| + | |||
To get us started, a pre-existing AES-128 encryption example is waiting for us deep inside the ChipWhisperer repository. You can find this at <code>chipwhisperer\hardware\victims\cw305_artixtarget\fpga\vivado_examples\aes128_verilog</code>. There are a couple of files and directories here: | To get us started, a pre-existing AES-128 encryption example is waiting for us deep inside the ChipWhisperer repository. You can find this at <code>chipwhisperer\hardware\victims\cw305_artixtarget\fpga\vivado_examples\aes128_verilog</code>. There are a couple of files and directories here: | ||
| − | * <code>aes128_verilog.xpr</code> is the project file. You can open this | + | * <code>aes128_verilog.xpr</code> is the project file. You can open this project using Vivado. |
| + | * <code>aes128_verilog.srcs\</code> contains Verilog source files for the project. Note that most of the code for this project is stored elsewhere - take a look at <code>cw305_artixtarget\fpga\common\</code> and <code>cw305_artixtarget\fpga\cryptosrc\</code> too. | ||
| + | * <code>aes128_verilog.runs\</code> contains the compiled output that is synthesized in Vivado. The most important part of this output is the bitstream (a .bit file), which is what we'll upload onto the target board. | ||
| + | |||
| + | When you open the project file, you should be greeted with a screen like: | ||
| + | |||
| + | [[File:CW305Vivado.PNG|800px]] | ||
| + | |||
| + | This is enough for us to start poking around in the code. | ||
== FPGA Code Layout == | == FPGA Code Layout == | ||
Revision as of 09:07, 16 January 2017
The CW305 target is an FPGA target board for use with the ChipWhisperer capture hardware. This board lets you test side channel analysis techniques on an Artix-7 FPGA. With this setup, a different toolchain is required: we won't be building C firmware with a makefile. This tutorial walks through the various steps required to run an AES-128 example on the CW305 target.
Contents
CW305 Hardware
If you're used to working with the ChipWhisperer Lite XMEGA or the UFO targets, the CW305 board will feel a bit different. Rather than sending data through a UART directly from the capture hardware, we'll now use two separate connections to the target board.
Hardware Setup
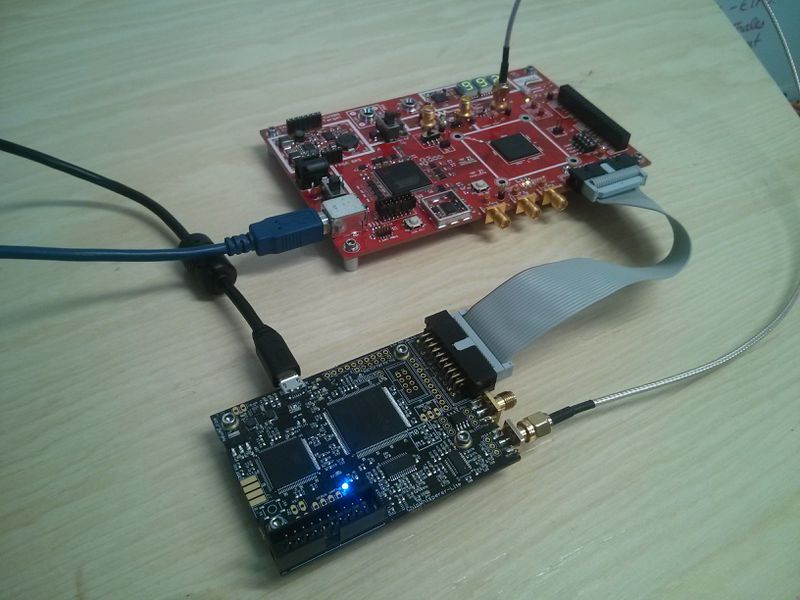
To get started, we need to make three connections to the CW305 target:
- We'll control the Artix-7 directly from the laptop via USB. This is done through the USB-B port on the left side of the board. (On the target, the Atmel SAM3U chip converts these USB packets into signals that the FPGA can understand.)
- We'll get control information for our power measurements through the 20-pin connector at the bottom of the board. This needs to be connected to your capture hardware (a ChipWhisperer Lite or Pro).
- Our power measurements will be done through an SMA cable. Depending on your capture setup, there are three SMA connectors that allow access to the power line in three ways (before the shunt resistor, after the shunt, and after a low noise amplifier). For the ChipWhisperer hardware, we'll connect the third one to our capture board.
Using a ChipWhisperer Lite, the full hardware setup looks like:
Target Firmware
In the ChipWhisperer examples, the Artix-7 FPGA is programmed using Verilog. This section describes how to open and build one of these projects. It also describes the layout of the AES-128 example, which is a good starting point for making new FPGA projects.
Opening the Project
The first thing we'll need is Xilinx Vivado HLx, which is their FGPA design software. The fully featured versions of this software require a $3000+ license. However, the WEBPACK version is free, with the limitation that it can only be used with 4 families of devices (including the Artix-7).
To get us started, a pre-existing AES-128 encryption example is waiting for us deep inside the ChipWhisperer repository. You can find this at chipwhisperer\hardware\victims\cw305_artixtarget\fpga\vivado_examples\aes128_verilog. There are a couple of files and directories here:
-
aes128_verilog.xpris the project file. You can open this project using Vivado. -
aes128_verilog.srcs\contains Verilog source files for the project. Note that most of the code for this project is stored elsewhere - take a look atcw305_artixtarget\fpga\common\andcw305_artixtarget\fpga\cryptosrc\too. -
aes128_verilog.runs\contains the compiled output that is synthesized in Vivado. The most important part of this output is the bitstream (a .bit file), which is what we'll upload onto the target board.
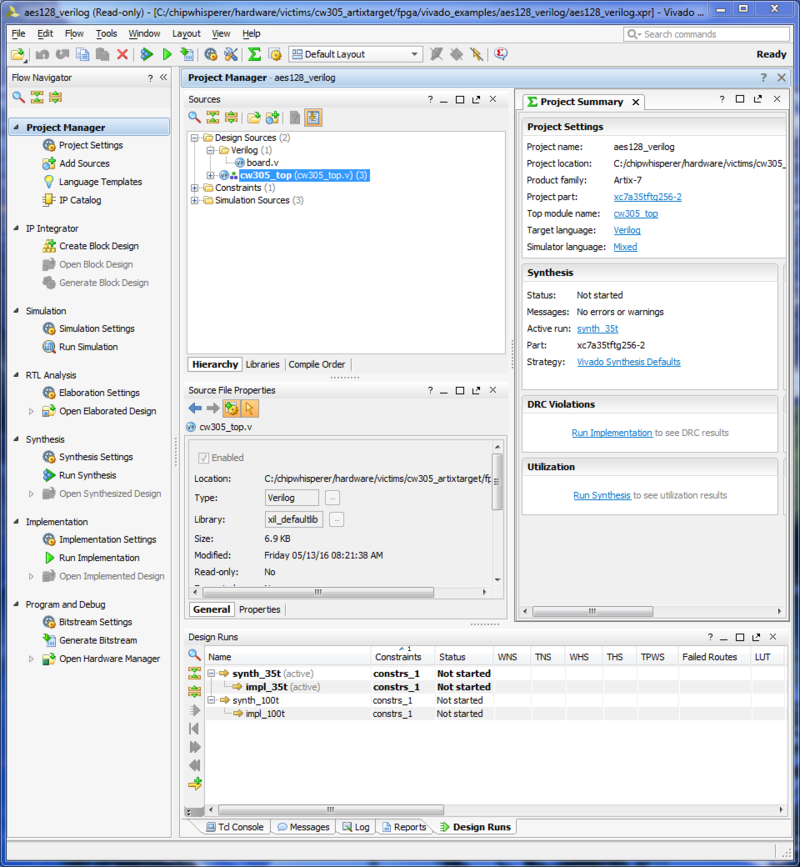
When you open the project file, you should be greeted with a screen like:
This is enough for us to start poking around in the code.
FPGA Code Layout
Building the Project
Capture Setup
- Example script - Upload bitstream - Sample captures

