| As of August 2020 the site you are on (wiki.newae.com) is deprecated, and content is now at rtfm.newae.com. |
CW308T-STM32F/ChipWhisperer Bootloader
The STM32Fx devices have a built-in bootloader, and the ChipWhisperer software as of 3.5.2 includes support for this bootloader.
Important notes before we begin:
- You MUST setup a clock and the serial lines for the chip. This is easily done by selecting a start-up script such as the "AES SimpleSerial on XMEGA" startup script.
- On the STM32F1, you MUST adjust the clock frequency to by 8MHz. The bootloader does not work with our usual 7.37 MHz clock frequency.
To access the bootloader you can perform these steps. They vary based on if you have a "Rev 02" board or a "Rev 03 or Later" board. The revision number is printed on the bottom side as part of the PCB part number (STM32F-03 is Rev -03 for example).
Rev -03 or Later
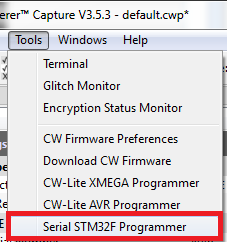
- Select the "Serial STM32F Programmer"
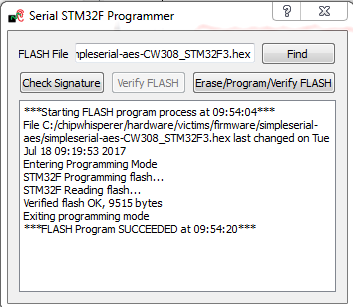
- Select the hex-file and press the "Program/Verify" button.
- The device should program, it may take a moment to fully program/verify on larger devices:
If you get verify errors, it's possible the shunt resistor is causing power to dip too low. This can be solved by mounting a jumper between the "SH-" and "SH+" pins at J16 (to the left of the SMA connector) on the UFO board. Retry programming with the jumper mounted.
Rev -02 Boards
The Rev -02 boards did not have all programming connections present. They require some additional steps:
- Select the "Serial STM32F Programmer"
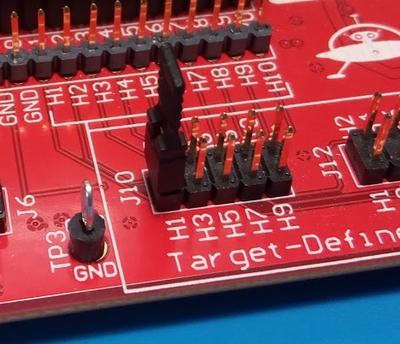
- Mount a jumper between the H1/H2 pins on the UFO board:
- Reset the ARM device either by pressing the reset button (newer UFO boards only), or by toggling power:
- Select the hex-file and press the "Program/Verify" button.
- The device should program, it may take a moment to fully program/verify on larger devices:
- Remove the jumper between the H1/H2 pins.
- Reset the ARM device either by pressing the reset button (newer UFO boards only), or by toggling power:
If you get verify errors, it's possible the shunt resistor is causing power to dip too low. This can be solved by mounting a jumper between the "SH-" and "SH+" pins at J16 (to the left of the SMA connector) on the UFO board. Retry programming with the jumper mounted.


