Setting up Software for B1
It is assumed that you've already followed the guide in Installing_ChipWhisperer. Thus it is assumed you are able to communicate with the ChipWhisperer CW1173 hardware (or whatever capture hardware you are using). Note in particular you must have configured the FPGA bitstream in the ChipWhisperer-Capture software, all part of the description in the Installing_ChipWhisperer guide.
Assuming this setup is complete, you can confirm you are able to communicate with the hardware by running the example capture of traces given in the CW1173_ChipWhisperer-Lite quick-start.
Programming the Example
Note with the CW1173 you need to configure a clock before programming of the device will succeed. Programming of the target device will be done as part of the CW-Capture software setup, discussed next.
Communicating from CW-Capture Software
Next, open the CW-Capture software. Then perform the following steps:
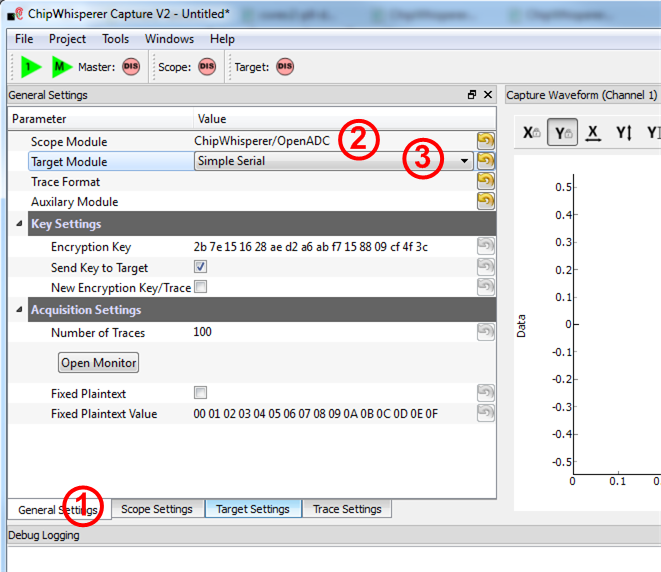
- Switch to the General Settings tab.
- As the Scope Module, select the ChipWhisperer/OpenADC option.
- As the Target Module, select the Simple Serial option.
Next, you'll have to configure the scope device in use.
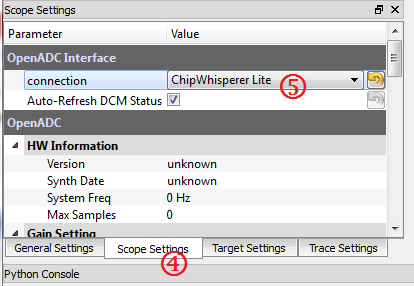
- Switch to the Scope Settings tab.
- As the connection, select the ChipWhisperer Lite protocol.
Next, you'll have to configure the target module:
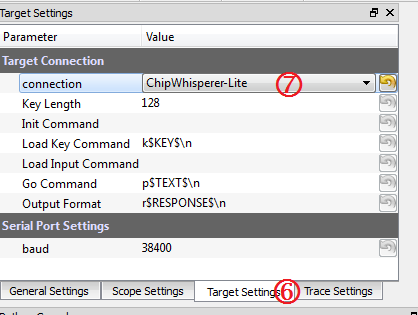
- Switch to the Target Settings tab
- As the connection, select the NewAE USB (CWLite/CW1200) option
- Press the button labeled Master: DIS, where DIS has a circle around it. If it works, it will switch to green and say CON.
We will now need to configure the clock to the XMEGA target device.
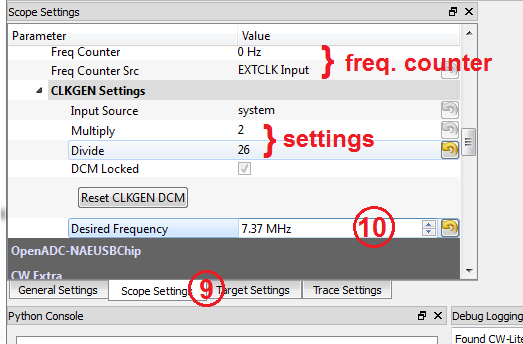
- Switch to the Scope Settings tab.
Scroll down to the CLKGEN section, and enter the Desired Frequency as 7.37 MHz. Hit
<enter>and you should see the multiply and divide settings change. Be careful of the units - you may need to click just on the numbers and enter that. You can also check the frequency settings using the Frequency Counter - to use this switch the Freq Counter Src to be CLKGEN. It should read 7.37 MHz.We now need to feed this generated clock to an output pin.
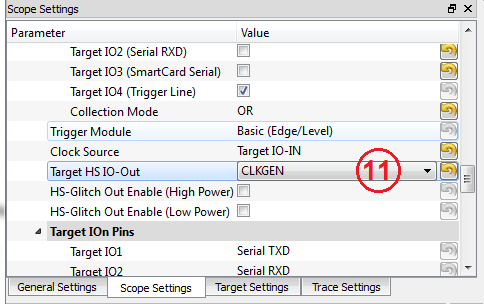
Scroll further down until you find the Target HS IO-Out function, set this to CLKGEN. The clock is now being sent on the Target-IO HS2 pin, which is used by the XMEGA as the input clock.
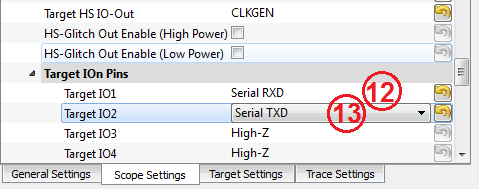
For dumb historical reasons the XMEGA and AVR have opposite TX/RX pinouts (on the original multi-target board, the AVR and XMEGA are designed such they can communicate, which required opposite TX/RX connections). Anyway you now need to switch the IO1 and IO2 functions from default:
- Change the Target IO1 function to be RXD.
- Change the Target IO2 function to be TXD.
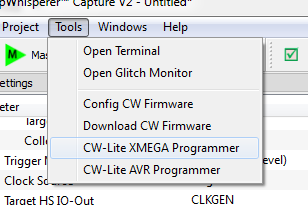
You can now program the XMEGA device! To do so, open the XMEGA Programmer from the Tools menu:
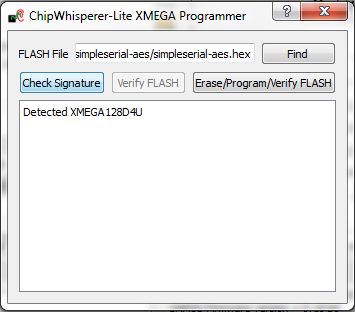
Hit the Check Signature button and confirm the device is detected. If not you may have issues with the clock setup.
Using the Find button, navigate to the
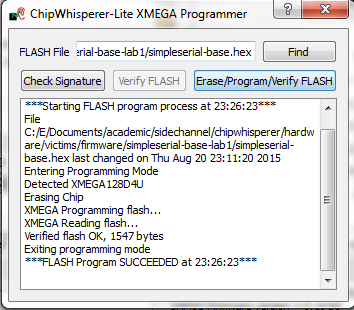
simpleserial-base.hexwhich you built earlier with themakecommand. You can then press the Erase/Program/Verify button, and confirm the file is programmed into the XMEGA device:Note the programmer dialog not only shows the successful programming status, but also shows when the
.hexfile was last modified. Always confirm this matches with when you last remember compiling the program -- if it is widely different this suggests you have selected the wrong file!Finally we can check communications with the programmed file:
- Close the XMEGA programmer dialog.
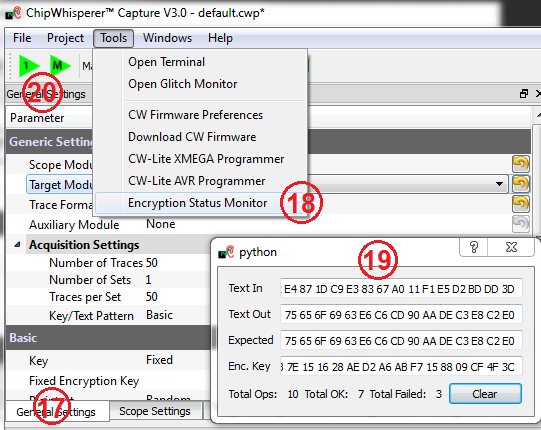
- Open the status monitor under Tools > Encryption Status Monitor.
- Resize the monitor window. The monitor will show sent & received data to the target.
- Hit the Run 1 button. You may have to hit it a few times, as the very first serial data is often lost. You should see data populate in the Text Out field of the monitor window. Note that each byte of the Text In is incremented in the Text Out field.
