| As of August 2020 the site you are on (wiki.newae.com) is deprecated, and content is now at rtfm.newae.com. |
Difference between revisions of "CW308T-STM32F/ChipWhisperer Bootloader"
| Line 22: | Line 22: | ||
To access the bootloader you can perform these steps. They vary based on if you have a "Rev 02" board or a "Rev 03 or Later" board. The revision number is printed on the bottom side as part of the PCB part number (STM32F-03 is Rev -03 for example). | To access the bootloader you can perform these steps. They vary based on if you have a "Rev 02" board or a "Rev 03 or Later" board. The revision number is printed on the bottom side as part of the PCB part number (STM32F-03 is Rev -03 for example). | ||
| − | == Rev -03 or Later == | + | === Rev -03 or Later === |
Run the following python code once you have the scope and target set up: | Run the following python code once you have the scope and target set up: | ||
| Line 38: | Line 38: | ||
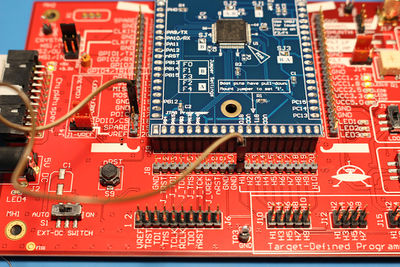
* If using a CW308 based STM, try mounting a jumper between the "SH-" and "SH+" pins at J16 (to the left of the SMA connector) on the UFO board. Retry programming with the jumper mounted. | * If using a CW308 based STM, try mounting a jumper between the "SH-" and "SH+" pins at J16 (to the left of the SMA connector) on the UFO board. Retry programming with the jumper mounted. | ||
| − | == Rev -02 Boards == | + | === Rev -02 Boards === |
The Rev -02 boards did not have all programming connections present. They require some additional steps: | The Rev -02 boards did not have all programming connections present. They require some additional steps: | ||
Revision as of 08:02, 7 May 2020
These instructions have been updated for ChipWhisperer 5. If you're using and earlier version, see https://wiki.newae.com/V4:CW308T-STM32F/ChipWhisperer_Bootloader
The STM32Fx devices have a built-in bootloader, and the ChipWhisperer software as of 3.5.2 includes support for this bootloader.
Important notes before we begin:
- You MUST setup a clock and the serial lines for the chip. This is easily done by connecting to the scope and target, then running
default_setup():
import chipwhisperer as cw
scope = cw.scope
target = cw.target(scope)
scope.default_setup()
- On the STM32F1, you MUST adjust the clock frequency to 8MHz. The bootloader does not work with our usual 7.37 MHz clock frequency. This 8MHz frequency does not apply to the code that you're running on the device. Once you're done programming, you'll need to set the frequency back to F_CPU (likely 7.37MHz) For example:
scope.default_setup()
scope.clock.clkgen_freq = 8E6
#program target...
scope.clock.clkgen_freq = 7.37E6
#reset and run as usual
To access the bootloader you can perform these steps. They vary based on if you have a "Rev 02" board or a "Rev 03 or Later" board. The revision number is printed on the bottom side as part of the PCB part number (STM32F-03 is Rev -03 for example).
Rev -03 or Later
Run the following python code once you have the scope and target set up:
prog = cw.programmers.STM32FProgrammer
cw.program_target(scope, prog, "<path to fw hex file>")
If you get errors during the programming process:
- Retry the programming process with a lower baud rate:
prog = cw.programmers.STM32FProgrammer
cw.program_target(scope, prog, "<path to fw hex file>", baud=38400)
- If using a CW308 based STM, try mounting a jumper between the "SH-" and "SH+" pins at J16 (to the left of the SMA connector) on the UFO board. Retry programming with the jumper mounted.
Rev -02 Boards
The Rev -02 boards did not have all programming connections present. They require some additional steps:
- Setup the device as usual:
scope = cw.scope()
target = cw.target(scope)
scope.default_setup()
- Mount a jumper between the H1 and PDIC pins (again this is ONLY for the -02 rev).
- Reset the ARM device either by pressing the reset button (newer UFO boards only), or by toggling power:
import time
scope.io.target_pwr = False
time.sleep(1)
scope.io.target_pwr = True
- Program the device:
prog = cw.programmers.STM32FProgrammer
cw.program_target(scope, prog, "<path to fw hex file>")
- The device should program, it may take a moment to fully program/verify on larger devices.
- Remove the jumper between the H1/H2 pins.
- Reset the ARM device either by pressing the reset button (newer UFO boards only), or by toggling power:
import time
scope.io.target_pwr = False
time.sleep(1)
scope.io.target_pwr = True
