CW501 Differential Probe
CW501 Differential Probe
The most basic method of measuring the power usage of a device is doing so by measuring the single-ended voltage across a resistor. Single-ended means we have a probe connected to one side of the resistor, and a common ground connection. But besides just measuring the drop across the resistor, you will also measure any variation in the power supply. This could be due to the regulator, environmental noise, or voltage variations from other areas of the circuit switching.
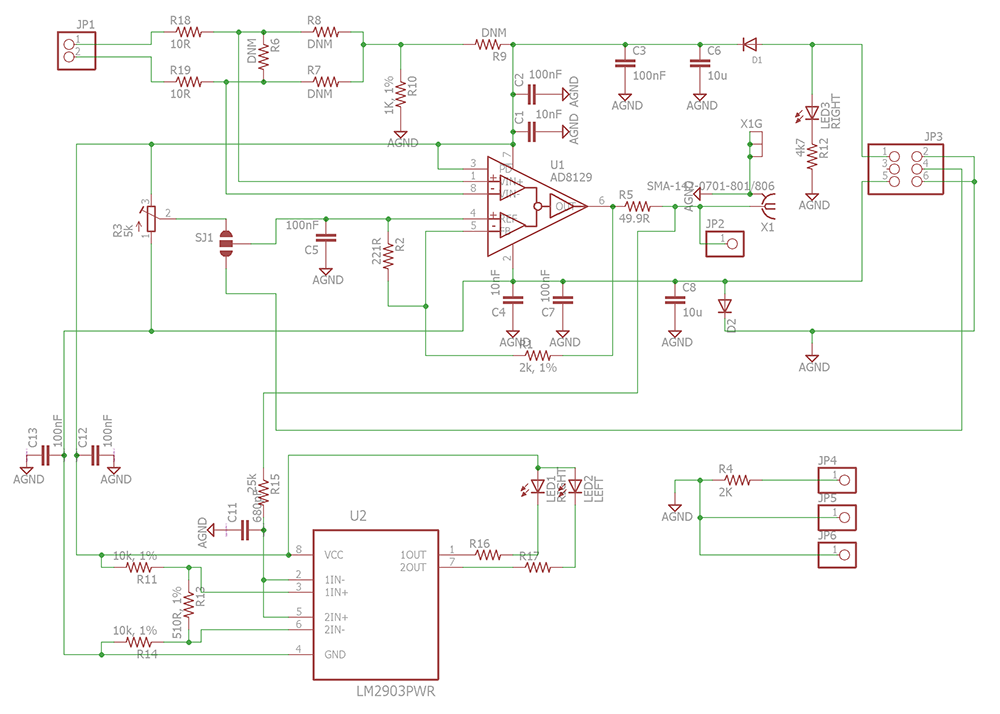
Rather than use a single-ended probe, a differential probe ignores that variation in voltage that is common to both sides of the resistor, also called common mode voltage. The measurement is now only the voltage drop across the resistor.
Features
- Can power from single or double-ended supply.
- Reverse polarity protection on supply (NB: 'V-' done via diode shunt, if 'V-' supply has more than 100mA permanant damage may still occur from reverse polarity).
- Adjustable DC offset to compensate for null constant differential voltage.
- Feedback LEDs to indicate if null is set correctly.
- Approx 20 kHz - 200 MHz Bandwidth (if null offset is disabled can be used down to 0 Hz).
- 10x gain.
Usage Information
Supply & Voltage Ranges
The supply voltages of the differential probe must be at least 2V above/below (for +V & -V respectively) the common mode voltage. The Probe Power Supply (CW503) provides a +/- 8V supply, allowing you to use the probe on any reasonable shunt inserted into VCC and GND.
If not using the CW503 probe power supply, ensure voltages are sufficient for your use. For example:
- If measuring the power across a shunt in the 3.3V rail, you should power the probe with at least +5V on the positive rail.
- If measuring the power across a shunt in the GND rail, you should power the probe with at least -2.25V on the negative rail, and +2.25V on the positive rail (the device requires 4.5V minimum between rails).
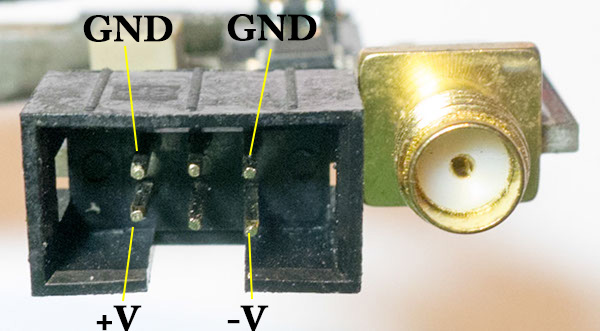
Be aware that if powering the probe via a single-ended supply (see below), you can only use the probe on a VCC shunt. The following shows the pinout of the 6-pin connector:
Single-Ended Supply Usage
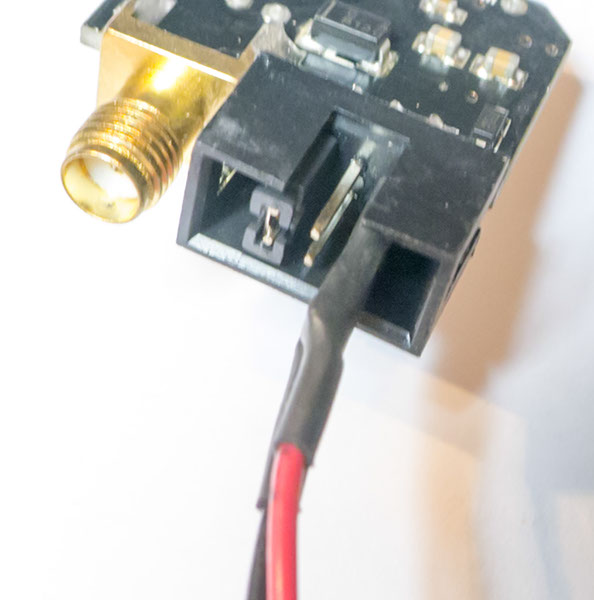
Using a single-ended supply means connecting the -V input to the GND pad. This is done via a jumper mounted as shown on the 6-pin connector:
Note again the common-mode limits still apply. This means the common-mode voltage must be at least +2V since the -V supply is 0V. Thus you can only use the single-ended power supply for a VCC shunt.
Common Mode Reference
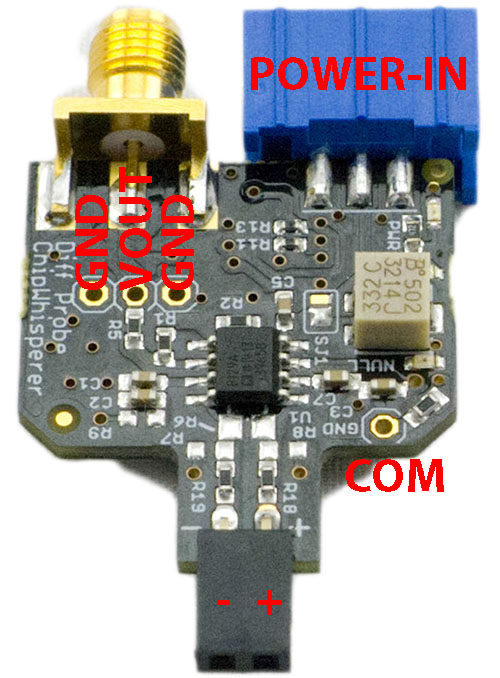
The common-mode reference point can be used to connect your system ground to the probe ground. Note you need to ensure the common-mode input voltage is with-in the allowed range (e.g. at least 2V away from either supply voltage). If you are powering the differential probe with another power supply, you must make sure they are referenced to each other by connecting the 0V/GND points together. Using a resistor reduces a small differential from causing a large current to flow if you accidently have ground loops (multiple connections of system grounds).
Zero Null Adjustment
When using the probe, there will often be a constant voltage we wish to null out. If measuring the current signature of a system, there will be a constant current usage we don't care about. Without a null adjustment, this constant current would cause the output of the differential probe to stick at a rail or otherwise clip the output.
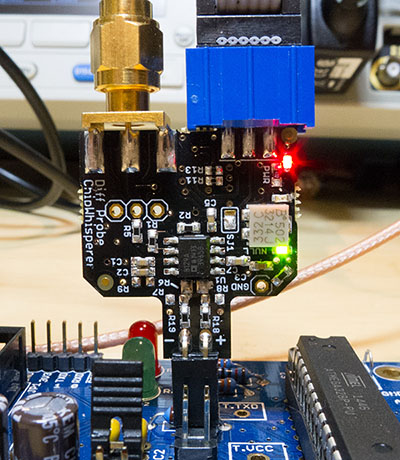
When setting up the probe, first connect it into the system with power, clock, etc connected. The two green LEDs on the side of the null adjustment show which way the trim-pot must be turned. If the green LEDs are off, the null adjustment is set correctly. In the following image the trim-pot needs to be turned towards the lower green LED until it extinguishes (note the trim pot is a multi-turn device):
When the null adjustment is set, the constant output voltage from the output of the differential probe should be half-way between the -V and +V supply. For example if using symmetrical supplies it should be around 0V, if using single-ended supplies it should be half of the +V voltage.
Usage at Lower Frequencies
Due to the null-offset adjustment, there is a lower frequency response of around 20 kHz. There is a gain roll-off below that point, meaning your gain at DC will be different (around 3-5x) than your gain at frequencies above 20 kHz. For applications such as measuring USB inrush current across a shunt you need the DC gain to be the same as the higher-frequency gain.
To accomplish this, there is two options:
- Solder SJ1 over to the other option, which provides an 'auxiliary input' for the adjustment voltage on the 6-pin header. This pin must be set to GND, but this method reduces the modifications to the probe.
- Solder SJ1 to GND (which should short capacitor C5).
Shunt Resistor Mounting
A number of resistor pads are present around the input. These can be mounted for a variety of options, most noteably if you mount resistor R6 it can serve as a shunt resistor.
Hardware Revisions
Note there is an older version of the hardware shown below. This version does not have the feedback LEDs for nulling the offset, or the shunt resistor mounting options. This is otherwise equivalent to the newer revision.
