CW303 XMEGA Target
CW303 Target: CW-Lite XMEGA Target Section
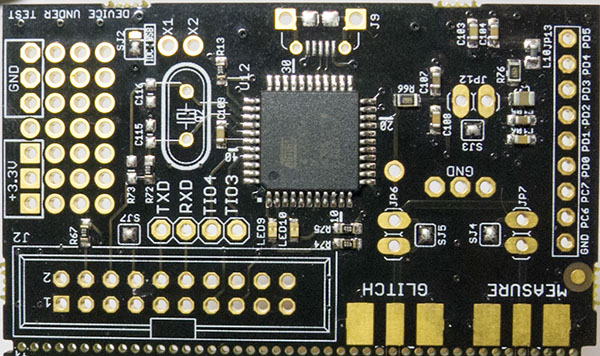
The ChipWhisperer-Lite board has a break-away target board section. This is officially labeled as a separate target board, but for most users will be present on the development board.
The board looks as follows:
LEDs
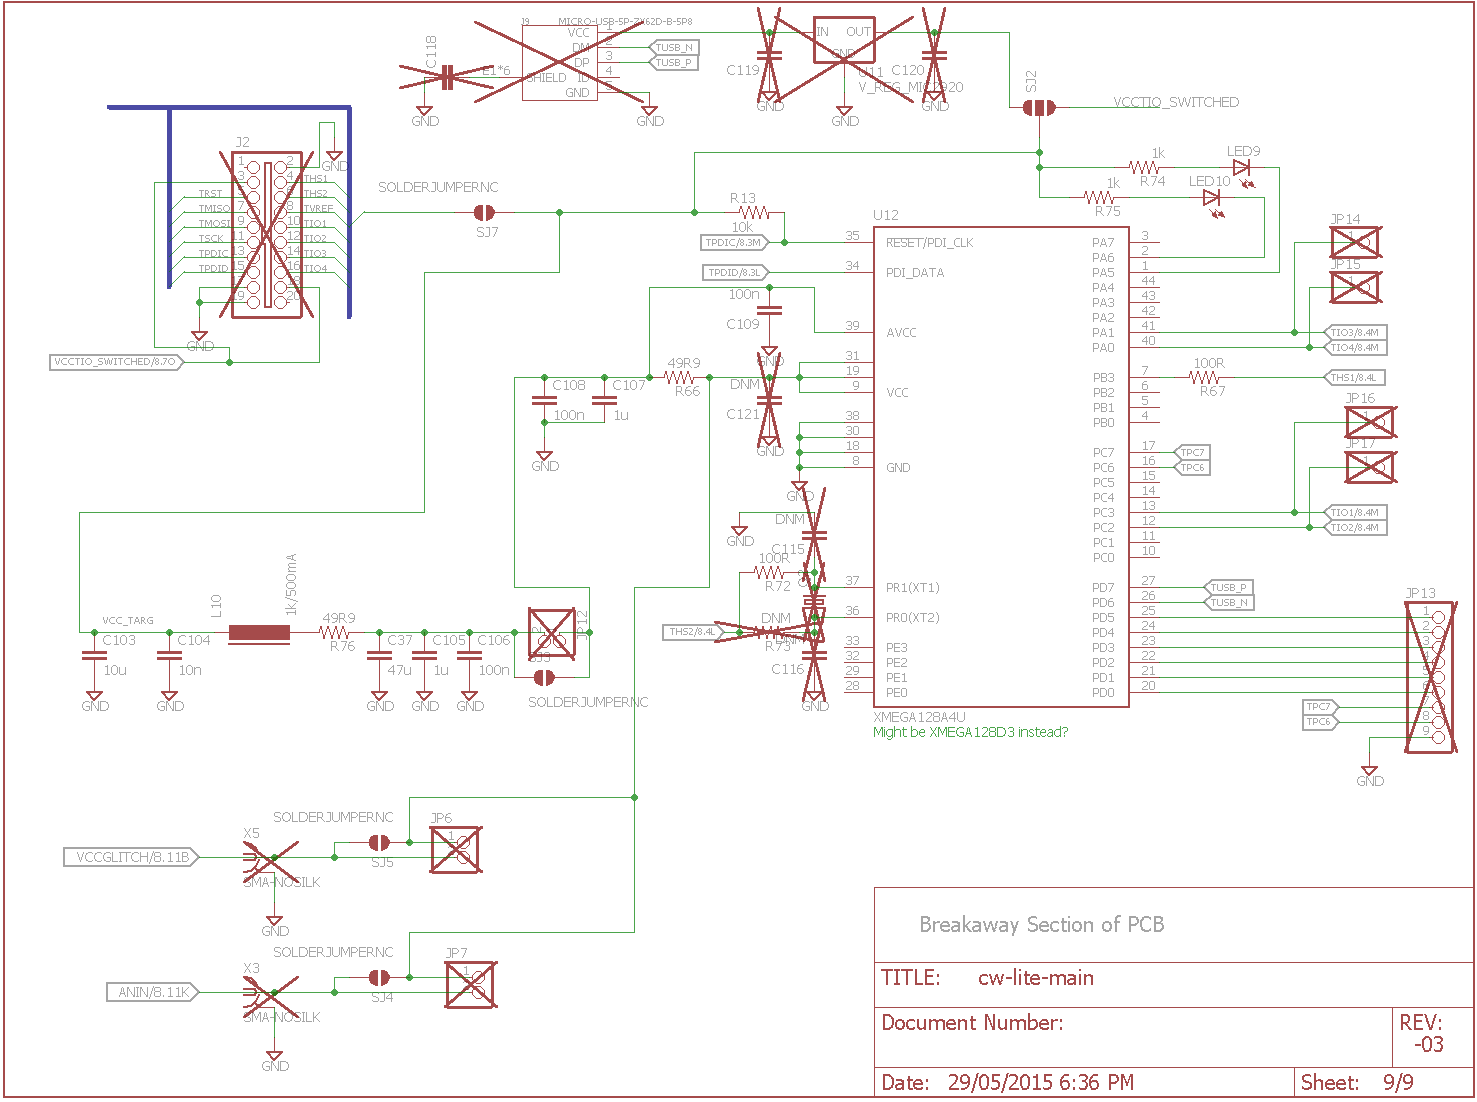
The two LEDs on the XMEGA board are active-low, which is done to reduce the impact on power consumption in the VCC power signature. The connections are as follows:
| Item | Connection | Note |
|---|---|---|
| LED9 | PORTA.5 | Active low |
| LED10 | PORTA.6 | Active low |
Connectors
The following shows several of the connectors available on the CW301.
- 20-Pin Connector
- J2 is a 20-pin connector, which uses the standard NewAE 20-pin connector pinout. See the ChipWhisperer-Lite documentation for details.
- SMA Glitch
- The SMA glitch connector allows VCC glitches be inserted into the VCC pin. This is done by shorting the resistive shunt R66. By default it connects to the SMA measure connector, but can be disconnected with the solder jumpers.
- SMA Measure
- The SMA measure connector allows power measurements to be taken across resistive shunt R66. By default it connects to the SMA glitch connector, but can be disconnected with the solder jumpers.
- JP13
- JP13 provides a pinout with several extra pins from the XMEGA device.
Solder Jumpers
- SJ2
- Selects the source of the input to the VCC filter - either the 20-pin 3.3V VCC (default), or the optional voltage regulator which derives the power from a USB-Micro connector.
- SJ3
- Connects the output of the VCC filter to the XMEGA VCC network. Soldered by default.
- SJ4
- Connects the SMA Measure header to the resistive shunt. Soldered by default.
- SJ5
- Connects the SMA Glitch header to the resistive shunt. Soldered by default.
- SJ7
- Connects the VCC of the XMEGA board to VREF on 20-pin header. Soldered by default.

